
3D Letters - Spraying Signage Letters
- davidhogg788
- May 4, 2021
- 3 min read
Updated: May 23, 2021

I thought i would write this blog to highlight the amount of work that goes into spraying typical 3d letters used for signage, we have found over the years that people simply do not understand the amount of time and labour that goes into making sprayed sign letters so i decided to make to a blog on the process for a set of typical letters.
3d letters : Stage 1. file sent to us
As we our a trade supplier to the sign industry the sign company will send us the file they need machined typically this will be A.I of PDF file format, once we receive the file from the sign company we check it for quality and make sure its to scale once we are happy with the artwork we save the file and send it to one of our CNC Routers for machining.
3d letters : Stage 2. CNC Routering the letters
We set the CNC router up with the correct material and correct tooling and machine out the letters paying very close attention to the edge finish of the letters especially with 19mm or 24mm ,we use special tools and a special cut path to get a super fine edge finish the better the edge finish on the letter the less work the sprayer has later on so this is very important and something a lot of other suppliers do not do. With this particular job some of the letters had to be 38mm thick so we had to stick two sets of letters together this might sound easy and a lot of people do over look now important this part is simply gluing the letters together is not good enough it really needs to be screwed , glued lined and stapled that is what we do it takes extra time and expense but it is the professional way for securing two letter faces this will stop the faces from separating and breaking the nice side wall paint job if you want a professionally finish on your 3d letters this is the only way to do it correctly.
3D LETTERS: STAGE 2. CNC ROUTERING THE LETTERS

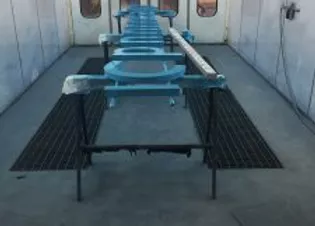
After the letters have been cnc machined and in this case pinned and glued together the next operation is to rough the surface and edge of the letters very lighly with 400 grade sandpaper or scotch pad this gives the primer something to stick to , once this has been done they are transferred to the spray booth and set up for first coat primer, we stick them to rails so they don´t move when spraying, we then set up the spray gun with the correct jet nozzle and make sure everything is working correctly including the all the safety equipment we are then ready for spraying.
3D LETTERS: STAGE 4. PRIMER COATINGS
The primer coatings are very important as its the base for the main colour coat it also helps seals the whole letter keeping out moisture, water and bacteria so its essential to get right and a must for a professional finish that will last year after year , we start with a good coat of primer we allow the primer to dry normally a couple of hours in the heated sprayed booth then the fun begins all the letters faces and sides need to be sanded down this removes any fur from the face and sides and leaves a nice smooth finish already keyed for the next coat we normally do 2-3 coats of primer sanded after each coat this is what gives you the real professional finish but its very time consuming and a labour intensive process, after the primer process is finished we are now ready for the colour top coat.


3D LETTERS: STAGE 5. COLOUR COAT
After the final primer coat is finished and sanded we mix up the correct colour of paint which the customer will supply a reference for , this is normally a Pantone or Ral colour code ,we match the codes make the paint up and then spray the 3d letters, normally 2 coats of the colour top coat does the job well , once the top coat is dry we can add extra layers of lacquer this can add extra shine or we can add a matt finish if the customer requires this , once the letters are fully cured and dry we take them back into the workshop and install locators or other fittings the customer has requested we can supply templates either in paper or hard plastic strip templates this leaves it very easy for the sign installer to install the letters on site.


3D LETTERS: STAGE 6. INSPECTION AND DELIVERY
Once the 3d letters are finished and fittings applied we check them for any defects before we send them to packaging, once all letters are finished and inspected we box and ship the letters direct to the sign company ready for installation.


Comments